Carbon Moto USA / Rider support
Mods for Confident Harley Touring: Fit, Feel, and Installation

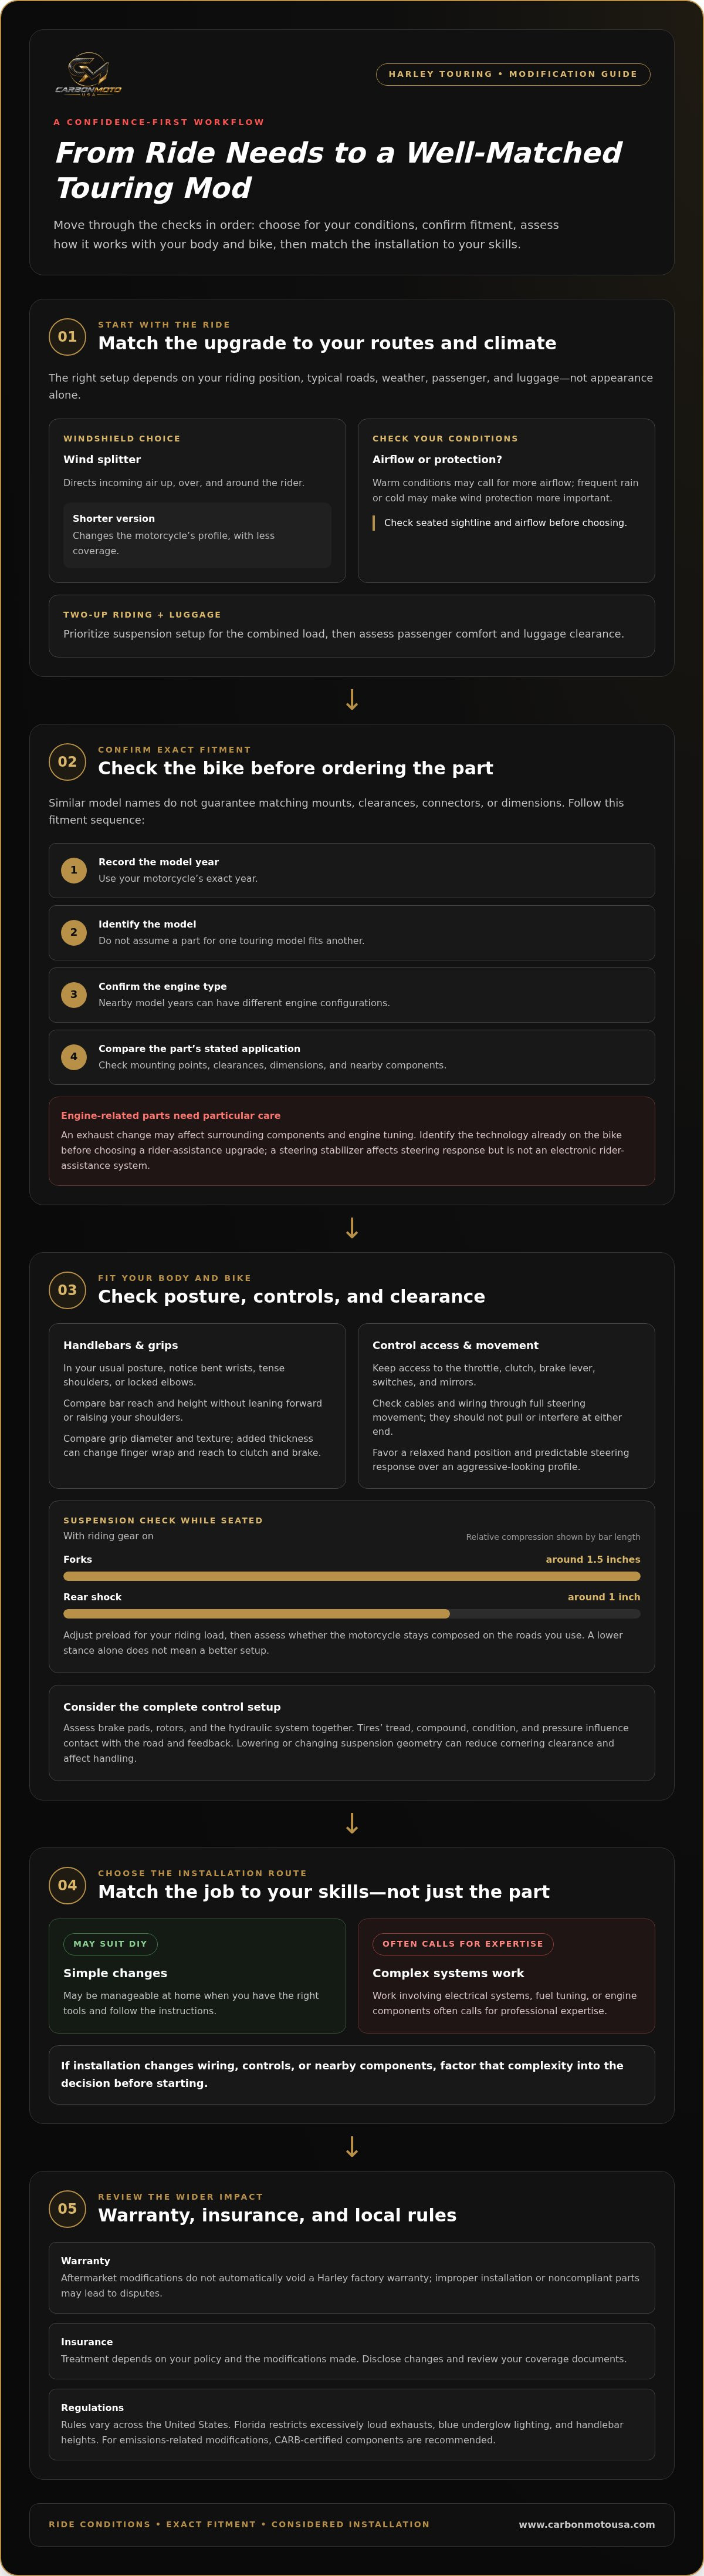
For confidence inspiring mods for Harley touring, choose upgrades that suit your riding style, climate, and motorcycle’s exact fitment. Simple changes may be manageable at home if you have the right tools and follow the instructions. Work involving electrical systems, fuel tuning, or engine components often calls for professional expertise. Match the job to your skills, not just the part to your bike.
It’s easy to focus on the part itself, but comfort and control depend on how each change works with your body and motorcycle. A windshield, grip, handlebar, or suspension adjustment can feel different depending on your posture, the roads you ride, and the weather you encounter.
This guide covers how to choose touring modifications for your riding conditions, assess ergonomics, and check compatibility by year, model, and engine type. You’ll also learn how to distinguish manageable DIY work from jobs where installation complexity makes professional help the more considered option.
Key Takeaways
- Choose touring upgrades around your riding position, typical routes, and climate so comfort changes suit how you actually ride.
- Assess grip and handlebar feel in your natural riding posture before choosing control changes for longer rides.
- Match every aftermarket part to your Harley’s year, model, and engine type to avoid fitment problems.
- Separate manageable installation tasks from work involving electrical systems, fuel tuning, or engine components, which often calls for professional expertise.
1. Choosing modifications for riding style and climate
Start with the routes you ride and the weather you face. The right windshield height and style depend on your riding position and style. A wind splitter directs incoming air up, over, and around the rider; a shorter version changes the motorcycle’s profile but offers less coverage. In warm conditions, consider airflow. If you often ride in rain or cold, wind protection may matter more. Check your seated sightline and airflow before choosing.
For two-up riding and luggage, prioritize suspension setup for the combined load, then assess passenger comfort and luggage clearance. With riding gear on, the forks should compress around 1.5 inches and the rear shock around an inch when seated. Floorboard extenders can create more foot space, reducing hip, knee, and ankle stress, and may help keep a foot away from the exhaust pipe.
Aftermarket modifications don’t automatically void a Harley factory warranty, but improper installation or noncompliant parts may lead to disputes. Insurance treatment depends on your policy and the modifications made, so disclose changes and review your coverage documents. Rules vary across the United States. Florida restricts excessively loud exhausts, blue underglow lighting, and handlebar heights. For emissions-related modifications, CARB-certified components are recommended.
Begin by adjusting preload for your riding load, then assess whether the motorcycle stays composed on the roads you use. A lower stance alone doesn’t mean the setup is better.
For brake feel, assess the pads, rotors, and hydraulic system together. Changing one component without considering the others can alter lever response. Lowering the motorcycle or changing its suspension geometry can reduce cornering clearance and affect handling, so evaluate stance alongside suspension travel and clearance. Choose confidence inspiring mods for Harley touring by prioritizing predictable control over appearance alone.
2. Handlebar and control ergonomics
Control upgrades should let your hands rest naturally while keeping steering inputs deliberate. Sit in your usual touring posture and notice whether your wrists bend, shoulders tense, or elbows lock. Compare handlebar reach and height without leaning forward or raising your shoulders. Ape Hangers, Drag Bars, and T-Bars place your hands differently, so don’t choose on style alone.
Custom handlebars and controls can change ergonomics and comfort on long rides. Before choosing a bar, consider whether its position leaves you access to the throttle, clutch, brake lever, switches, and mirrors. Check that cables and wiring allow full steering movement without pulling or interference at either end of travel. A controlled fit matters more than an aggressive-looking profile.
Give grips the same close attention. Harley riders can choose from varied designs and materials, so compare diameter, surface texture, and how securely each grip sits in your hands. Grip covers are another option; one rider reported using a set for three years. After changing grips, check your reach to the clutch and brake, as added thickness can affect how your fingers wrap.
For confidence and control, pair a relaxed hand position with predictable steering response. Tires also affect grip and handling: tread, compound, condition, and pressure influence contact with the road and feedback through the motorcycle. Choose tires suited to your riding conditions, then assess handling with the controls adjusted to your posture.
Road Glide and Street Glide riders considering steering-control changes can explore the Harley touring steering stabilizer options, including the Harley Davidson Road Glide Death Deleter Steering Stabilizer Kit and Harley-Davidson Street Glide Death Deleter Steering Stabilizer Kit. Treat a stabilizer as one component in a considered setup, alongside bar position, grip feel, and tire condition.
3. Model-year and engine fitment compatibility
Before ordering an aftermarket part, check fitment against your Harley’s year, model, and engine type. A seat, windshield, or exhaust designed for one Road Glide configuration may not suit another. Similar model names don’t guarantee matching mounting points, clearances, connectors, or dimensions. Use your motorcycle’s exact details and compare them with the part’s stated fitment range.
Engine changes deserve particular care. Two touring bikes from nearby model years may use different engine configurations, affecting compatibility with engine-related components. One rider noted he wouldn’t have pursued oversized pistons or head work if his bike had come with a 103 engine. That example shows why engine type belongs in the fitment check, not just the model name.
Before choosing a seat, windshield, or exhaust, check its fitment against your exact motorcycle. Compare mounting points and clearances, and consider how the component interacts with nearby parts. An exhaust change, for example, may affect surrounding components and engine tuning. Don’t assume a part made for one Harley touring model will fit another.
Rider-assistance upgrades also depend on the specific model and year. Distinguish electronic systems from mechanical steering-control components: a stabilizer affects steering response, but it isn’t an electronic rider-assistance system. Identify the technology already on your motorcycle before selecting a compatible upgrade.
Follow a focused fitment sequence: record the model year, identify the model, confirm the engine type, and compare the part’s application details. Then check whether installation requires changes to wiring, controls, or nearby components. This helps prevent mismatches that can waste time and leave a modification unfinished. For example, verify a replacement exhaust’s intended fit before planning related engine modifications. Treat each component as part of your motorcycle’s complete configuration, not as a universal accessory.
4. DIY versus professional installation
Choose an installer based on the work involved, not the part’s appearance. A grip replacement or simple accessory may suit a rider with the right tools, clear instructions, and experience following mechanical procedures. Electrical systems, fuel tuning, and engine components are more complex and often require professional expertise.
Before starting a DIY job, read the manufacturer’s instructions from beginning to end. Confirm the part fits your Harley’s year, model, and engine, then identify the required tools and adjustment steps. Stop if the procedure calls for wiring changes, fuel calibration, or engine disassembly beyond your experience. An interrupted installation can leave the motorcycle unusable or create more work.
Budget depends on the modification and the work involved. Account separately for the component, any required tuning, and labor when professional installation is appropriate. Electrical work, fuel tuning, and engine modifications involve different tasks, so compare the scope rather than treating every installation as equivalent.
Whether you install the part yourself or get help, plan the work before removing components. Set out the instructions and required tools, and choose a clean place to organize hardware. Follow the specified sequence, and don’t substitute fasteners or skip adjustment steps. When finished, inspect the work and make sure controls move freely. For electrical or engine work, verify that the system operates as intended before riding.
A professional is the more considered choice when the instructions require electrical diagnostics, fuel tuning, or internal engine work. For a manageable mechanical task, DIY can make sense when you understand each step and have the right equipment. To explore steering-related hardware as part of your modification plan, review Harley touring steering components.
Harley exhaust or air-intake upgrades can alter the air-fuel ratio; professional dyno tuning is recommended for safe, efficient operation. A Road Glide owner reported losing torque around 2400 to 3000 rpm after mufflers with insufficient back pressure.
Carbon Moto USA: BMW R 1300 GS Carbon Fiber
Carbon Moto USA offers BMW R 1300 GS Carbon Fiber for riders building around that specific motorcycle. Its other carbon fiber offerings include BMW R 1250 GS, Harley Davidson Pan America, and Ducati applications. For Harley touring riders focused on steering control, the relevant options are the Harley Davidson Road Glide Death Deleter Steering Stabilizer Kit and Harley-Davidson Street Glide Death Deleter Steering Stabilizer Kit. These components fit a targeted modification plan when your motorcycle is one of those models and steering stability is the focus. Match the offering to your exact bike and intended build, rather than treating parts as universal upgrades. For information about these Harley touring options, contact Carbon Moto USA.
Make your next modification a deliberate one
A touring build doesn’t need to happen all at once. Start with the change that addresses your most noticeable riding concern, then assess the result before adding another component. This measured approach keeps each adjustment purposeful and makes it easier to understand how your motorcycle responds.
The confidence inspiring mods for Harley touring depend on your bike, your riding priorities, and the work you’re prepared to take on. For Harley touring steering-control options, Carbon Moto USA offers Road Glide and Street Glide Death Deleter Steering Stabilizer Kits. Its carbon fiber offerings also include BMW R 1300 GS, BMW R 1250 GS, and Harley Davidson Pan America applications, each intended for its named motorcycle.
Keep your next step specific: identify your motorcycle and the outcome you want from its setup. Ask Carbon Moto USA about your options and continue shaping a build that feels considered, capable, and distinctly yours.
Frequently Asked Questions
Can I install aftermarket Harley parts myself, or should I seek professional help?
Yes, if the job is within your mechanical experience and you can follow the part’s instructions precisely. A small accessory can be a reasonable first project. Pause if the procedure requires specialized diagnostics or adjustments you haven’t done before. Before riding, confirm the installed part is secure and nearby controls, wiring, and moving components operate without interference.
How do I know if a part is compatible with my Harley model?
Compare the part’s listed application with your Harley’s exact model year, trim, and factory configuration. A model name alone may not distinguish versions with different mounting points or component layouts. For example, check a fairing’s attachment locations against your bike’s existing hardware and compare any connector requirements. If a detail differs, don’t assume the part will fit just because the motorcycles share a model family.
What ergonomic upgrades help riders feel more secure on Harley touring motorcycles?
Prioritize controls that help you maintain a relaxed, ready posture during slow turns and repeated stops. Choose grips that feel comfortable in your hands, and set lever reach so you can operate the clutch and brake without shifting your hold. Handlebar position should keep your wrists neutral and shoulders relaxed. A familiar posture makes it easier to apply control inputs consistently as road conditions change.
Which rider-assistance or safety technology upgrades are available for Harley touring models?
Upgraded LED lighting can add visibility. Road Glide and Street Glide riders can also consider steering stabilizers, which affect steering response but are mechanical components, not electronic rider-assistance systems.